Monday, July 22, 2024

LivePortrait AI: Transform Static Photos into Talking Videos. Now Supporting Video-to-Video Conversion and Superior Expression Transfer at Incredible Speed

LivePortrait AI: Transform Static Photos into Talking Videos. Now Supporting Video-to-Video Conversion and Superior Expression Transfer at Incredible Speed


We anticipate a new tutorial showcasing the latest changes and features in V3, which introduces Video-to-Video functionality and additional enhancements.


This guide covers both Windows (local) and Cloud installation methods (Massed Compute, RunPod, and free Kaggle Account).


The V3 update introduces video-to-video capabilities. If you're seeking a one-click installation method for LivePortrait, an open-source zero-shot image-to-animation application on Windows for local use, this tutorial is ideal. We'll introduce you to LivePortrait, a cutting-edge open-source image-to-animation generator. Simply provide a static image and a driving video to create an impressive animation within seconds. LivePortrait is remarkably fast and adept at preserving facial expressions from the input video. The results are truly astonishing.


πŸ”— Windows Local Installation Tutorial ️⤵️

▶️ https://youtu.be/FPtpNrmuwXk


πŸ”— LivePortrait Installers Scripts ⤵️

▶️ https://www.patreon.com/posts/107609670


πŸ”— Requirements Step by Step Tutorial ⤵️

▶️ https://youtu.be/-NjNy7afOQ0


πŸ”— Cloud Massed Compute, RunPod & Kaggle Tutorial (Mac users can follow this tutorial) ⤵️

▶️ https://youtu.be/wG7oPp01COg


πŸ”— Official LivePortrait GitHub Repository ⤵️

▶️ https://github.com/KwaiVGI/LivePortrait


πŸ”— SECourses Discord Channel to Get Full Support ⤵️

▶️ https://discord.com/servers/software-engineering-courses-secourses-772774097734074388


πŸ”— Paper of LivePortrait: Efficient Portrait Animation with Stitching and Retargeting Control ⤵️

▶️ https://arxiv.org/pdf/2407.03168


0:00 Introduction to the state-of-the-art open-source image-to-animation application LivePortrait

2:20 How to download and install the LivePortrait Gradio application on your computer

3:27 Requirements for the LivePortrait application and installation process

4:07 Verifying accurate installation of requirements

5:02 Confirming successful installation completion and saving installation logs

5:37 Starting the LivePortrait application post-installation

5:57 Exploring the additional materials provided, including portrait images, driving videos, and rendered videos

7:28 Using the LivePortrait application

8:06 VRAM usage when generating a 73-second animation video

8:33 Animating the first image

8:50 Monitoring the animation process status

10:10 Completion of the first animation video rendering

10:24 Resolution of the rendered animation videos

10:45 Original output resolution of LivePortrait

11:27 Improvements and new features coded on top of the official demo app

11:51 Default save location for generated animated videos

12:35 The effect of the Relative Motion option

13:41 The effect of the Do Crop option

14:17 The effect of the Paste Back option

15:01 The effect of the Target Eyelid Open Ratio option

17:02 How to join the SECourses Discord channel


The V3 update introduces video-to-video functionality. If you're interested in using LivePortrait, the open-source zero-shot image-to-animation application, but lack a powerful GPU, are a Mac user, or prefer cloud-based solutions, this tutorial is perfect for you. We'll guide you through the process of installing and using the LivePortrait application with just one click on #MassedCompute, #RunPod, and even on a free #Kaggle account. After this tutorial, you'll find running LivePortrait on cloud services as straightforward as running it on your own computer. LivePortrait is the latest state-of-the-art static image to talking animation generator, surpassing even paid services in both speed and quality.


πŸ”— Cloud (no-GPU) Installations Tutorial for Massed Compute, RunPod and free Kaggle Account ️⤵️

▶️ https://youtu.be/wG7oPp01COg


πŸ”— LivePortrait Installers Scripts ⤵️

▶️ https://www.patreon.com/posts/107609670


πŸ”— Windows Tutorial - Watch To Learn How To Use ⤵️

▶️ https://youtu.be/FPtpNrmuwXk


πŸ”— Official LivePortrait GitHub Repository ⤵️

▶️ https://github.com/KwaiVGI/LivePortrait


πŸ”— SECourses Discord Channel to Get Full Support ⤵️

▶️ https://discord.com/servers/software-engineering-courses-secourses-772774097734074388


πŸ”— Paper of LivePortrait: Efficient Portrait Animation with Stitching and Retargeting Control ⤵️

▶️ https://arxiv.org/pdf/2407.03168


πŸ”— Upload / download big files / models on cloud via Hugging Face tutorial ⤵️

▶️ https://youtu.be/X5WVZ0NMaTg


πŸ”— How to use permanent storage system of RunPod (storage network volume) ⤵️

▶️ https://youtu.be/8Qf4x3-DFf4


πŸ”— Massive RunPod tutorial (shows runpodctl) ⤵️

▶️ https://youtu.be/QN1vdGhjcRc


0:00 Introduction to the state-of-the-art open-source image-to-animation application LivePortrait cloud tutorial

2:26 Installing and using LivePortrait on MassedCompute with an exclusive discount coupon code

4:28 Applying our special Massed Compute coupon for a 50% discount

4:50 Setting up the ThinLinc client to connect and use the Massed Compute virtual machine

5:33 Configuring the ThinLinc client's synchronization folder for file transfer between your computer and MassedCompute

6:20 Transferring installer files into the Massed Compute sync folder

6:39 Connecting to the initialized Massed Compute virtual machine and installing the LivePortrait app

9:22 Starting and using the LivePortrait application on MassedCompute post-installation

10:20 Launching a second instance of LivePortrait on the second GPU on Massed Compute

12:20 Locating generated animation videos and downloading them to your computer

13:23 Installing LivePortrait on the RunPod cloud service

14:54 Selecting the appropriate RunPod template

15:20 Configuring RunPod proxy access ports

16:21 Uploading installer files to RunPod's JupyterLab interface and initiating the installation process

17:07 Starting the LivePortrait app on RunPod after installation

17:17 Launching LivePortrait on the second GPU as a second instance

17:31 Connecting to LivePortrait through RunPod's proxy connection

17:55 Animating the first image on the RunPod instance with a 73-second driving video

18:27 Demonstrating the app's impressive speed in animating a 73-second video

18:41 Understanding and troubleshooting input upload errors with an example case

19:17 One-click download of all generated animations on RunPod

20:28 Monitoring the progress of animation generation

21:07 Installing and using LivePortrait for free on a Kaggle account with impressive speed

24:10 Creating the first animation on Kaggle after installing and launching the LivePortrait app

24:22 Ensuring full upload of input images and videos to avoid errors

24:35 Tracking the animation status and progress on Kaggle

24:45 Monitoring GPU, CPU, RAM, and VRAM usage, and the animation process speed of LivePortrait on Kaggle

25:05 Downloading all generated animations on Kaggle with one click

26:12 Restarting the LivePortrait app on Kaggle without reinstallation

26:36 Joining the SECourses Discord channel for support and community interaction


Monday, July 1, 2024

How to Use SwarmUI & Stable Diffusion 3 on Cloud Services Kaggle (free), Massed Compute & RunPod

Tutorial Video : 

This video provides a comprehensive guide on installing and utilizing #SwarmUI on various cloud services. It's particularly valuable for those without a powerful GPU or seeking additional GPU power. The tutorial covers the implementation of SwarmUI, a leading Generative AI interface, on platforms such as Massed Compute, RunPod, and Kaggle (which offers complimentary dual T4 GPU access for 30 hours per week). This instructional content aims to simplify the process of using SwarmUI on cloud GPU providers, making it as straightforward as using it on a local computer. Additionally, the video demonstrates the application of Stable Diffusion 3 (#SD3) in cloud environments. It's worth noting that SwarmUI employs a #ComfyUI backend.

πŸ”— Access the Video's Public Post (no login required) with All Links ➡️ https://www.patreon.com/posts/stableswarmui-3-106135985

πŸ”— Windows Tutorial: Learn to Use SwarmUI ➡️ 


πŸ”— Tutorial: Fast Model Downloads for Massed Compute, RunPod, Kaggle & Quick Uploads to Hugging Face ➡️ 


πŸ”— Stable Diffusion GitHub Repository (Please Star, Fork and Watch) ➡️ https://github.com/FurkanGozukara/Stable-Diffusion

Promotional Code for Massed Compute: SECourses
This code is applicable to Alt Config RTX A6000 and RTX A6000 GPUs

0:00 Introduction to the SwarmUI cloud services tutorial (Massed Compute, RunPod & Kaggle)
3:18 SwarmUI installation and usage on Massed Compute virtual Ubuntu machines
4:52 ThinLinc client synchronization folder setup for Massed Compute virtual machine access
6:34 Connecting to and initiating use of Massed Compute virtual machine post-initialization
7:05 One-click SwarmUI update on Massed Compute prior to usage
7:46 Configuring multiple GPUs on SwarmUI backend for simultaneous image generation
7:57 Monitoring all GPU statuses using nvitop command
8:43 Pre-installed Stable Diffusion models on Massed Compute
9:53 Model download speed on Massed Compute
10:44 Identifying GPU backend setup errors in 4 GPU configuration
11:42 Monitoring status of all 4 active GPUs
12:22 Image generation and step speed for SD3 on RTX A6000 (Massed Compute)
12:50 CivitAI API key setup for accessing gated models
13:55 Quick download method for generated images from Massed Compute
15:22 Latest SwarmUI installation on RunPod with proper template selection
16:50 Port configuration for SwarmUI connection post-installation
17:50 Downloading and executing installer sh file for SwarmUI on RunPod
19:47 Pod restart procedure to resolve backend loading issues
20:22 Reinitiating SwarmUI on RunPod
21:14 Downloading and implementing Stable Diffusion 3 (SD3) on RunPod
22:01 Multiple GPU backend system setup on RunPod
23:22 Generation speed analysis on RTX 4090 (SD3 step speed)
24:04 Rapid download technique for RunPod-generated images
24:50 SwarmUI and Stable Diffusion 3 installation and usage on free Kaggle accounts
28:39 Altering model root folder path in SwarmUI on Kaggle for temporary disk space utilization
29:21 Adding a second backend to leverage the additional T4 GPU on Kaggle
29:32 Cancelling and restarting SwarmUI runs
31:39 Implementing Stable Diffusion 3 model on Kaggle for image generation
33:06 Troubleshooting and resolving RAM errors on Kaggle
33:45 Disabling one backend to prevent RAM errors when using T5 XXL text encoder twice
34:04 Stable Diffusion 3 image generation speed analysis on Kaggle's T4 GPU
34:35 Bulk download method for Kaggle-generated images to local devices

1. Introduction to SwarmUI and Cloud Computing Platforms

In this article, a comprehensive guide is provided on how to use SwarmUI, Stable Diffusion 3, and other Stable Diffusion models on various cloud computing platforms. The tutorial covers three main options for users who don't have access to powerful GPUs: Massed Compute, RunPod, and Kaggle. Each platform offers unique advantages and capabilities for running SwarmUI and generating high-quality images using advanced AI models.

1.1 Overview of Platforms

Massed Compute is introduced as the cheapest and most powerful cloud server provider. The process of setting up and using SwarmUI on Massed Compute is explained in detail, highlighting its pre-installation feature and the latest version availability.

RunPod is presented as another cloud service provider that offers access to high-performance GPUs. The tutorial demonstrates how to install and use SwarmUI on RunPod, promising mind-blowing speeds for image generation.

Lastly, the article covers how to install and use SwarmUI on a free Kaggle account, showcasing the ability to utilize both of Kaggle's provided T4 GPUs simultaneously for generating images with SwarmUI and running Stable Diffusion 3 with advanced text encoders.

1.2 Prerequisites

Before diving into the cloud-based setups, the article strongly recommends watching a 90-minute SwarmUI tutorial for Windows users. This comprehensive guide covers everything about using SwarmUI and is essential for understanding the full capabilities of the software. The current tutorial focuses primarily on installation and setup procedures for cloud platforms, assuming the reader has already familiarized themselves with SwarmUI's functionality.

2. Setting Up SwarmUI on Massed Compute

Massed Compute is highlighted as an excellent choice for running SwarmUI due to its cost-effectiveness and powerful hardware offerings. The setup process is straightforward, thanks to pre-installed images and easy-to-follow instructions.

2.1 Registration and Deployment

To get started with Massed Compute, use the specially provided link for registration. After registering and setting up billing information, users can deploy their virtual machine by following these steps:

1. Navigate to the "Deploy" section.
2. Select the appropriate GPU configuration (RTX A6000 or RTX A6000 Alt config).
3. Choose the "Creator" category and "SE courses" image.
4. Apply the special coupon code "SECourses verify" to reduce the hourly rate.
5. Click "Deploy" to create the instance.

2.2 Connecting to the Virtual Machine

Once the virtual machine is deployed, users need to connect to it using the ThinLinc client. The process involves:

1. Downloading and installing the ThinLinc client appropriate for your operating system.
2. Configuring the client settings, including setting up a synchronization folder for file transfers.
3. Using the provided IP address and credentials to connect to the virtual machine.

2.3 Initial Setup and Updates

After connecting to the virtual machine, users are greeted with a desktop environment where SwarmUI is pre-installed. The article recommends running the updater to ensure the latest version of SwarmUI is installed. This process is automated and typically completes quickly.

2.4 Configuring SwarmUI for Multi-GPU Usage

Massed Compute allows users to utilize multiple GPUs for faster image generation. The article provides step-by-step instructions on how to configure SwarmUI to take advantage of multiple GPUs:

1. Navigate to the Server > Backends section in SwarmUI.
2. Add additional ComfyUI self-starting backends.
3. Assign each backend to a different GPU by setting the appropriate GPU ID.

This configuration allows for parallel processing, significantly increasing the speed of image generation.

2.5 Downloading and Using Models

The article explains how to download and use various Stable Diffusion models, including SDXL and Stable Diffusion 3. It covers the process of selecting models, configuring generation parameters, and initiating batch generations.

2.6 CivitAI Integration

A new feature introduced in SwarmUI is the ability to use CivitAI API keys for downloading gated models. The article provides instructions on how to obtain and configure the API key within SwarmUI, enhancing the user's access to a wider range of models.

2.7 Retrieving Generated Images

To download generated images from Massed Compute, users can follow these steps:

1. Navigate to the appropriate output folder within the virtual machine's file system.
2. Copy the folder to the synchronized ThinLinc drive.
3. Access the images from the local synchronization folder on their personal computer.

3. Setting Up SwarmUI on RunPod

RunPod is presented as another powerful option for running SwarmUI, offering high-performance GPUs and flexible deployment options.

3.1 Account Setup and Pod Deployment

The article guides users through the process of setting up a RunPod account and deploying a pod:

1. Use the provided registration link to create an account.
2. Set up billing and load credits.
3. Navigate to the "Pods" section and click "Deploy Pod."
4. Select the Community Cloud option (or set up permanent storage if desired).
5. Choose the appropriate GPU and RAM configuration.
6. Select the "RunPod PyTorch 2.1 with CUDA 11.8" template.

3.2 Installing SwarmUI on RunPod

The installation process for SwarmUI on RunPod involves using a custom installation script:

1. Connect to the pod's JupyterLab interface.
2. Upload the provided installation script.
3. Execute the script using the terminal within JupyterLab.
4. Follow the on-screen prompts to complete the installation.

3.3 Configuring and Using SwarmUI on RunPod

After installation, the article covers how to access and configure SwarmUI:

1. Connect to the SwarmUI interface through the provided HTTP service port.
2. Customize settings and select desired models for download.
3. Configure multi-GPU usage similar to the Massed Compute setup.
4. Generate images using various Stable Diffusion models, including Stable Diffusion 3.

3.4 Downloading Generated Images

The tutorial explains multiple methods for retrieving generated images from RunPod, including:

1. Using the JupyterLab interface to download files directly.
2. Uploading images to Hugging Face for easier access.
3. Using RunPodCTL for advanced file management.

4. Using SwarmUI on a Free Kaggle Account

The article provides a unique approach to using SwarmUI on a free Kaggle account, allowing users to leverage Kaggle's GPU resources for AI image generation.

4.1 Setting Up the Kaggle Environment

To use SwarmUI on Kaggle, users need to follow these steps:

1. Create a free Kaggle account and verify the phone number.
2. Create a new notebook and import the provided SwarmUI setup notebook.
3. Configure the notebook to use GPU T4 x2 accelerator.

4.2 Installing and Configuring SwarmUI

The installation process on Kaggle involves running a series of notebook cells:

1. Execute cells to download desired models to the temporary disk space.
2. Run the SwarmUI installation cell.
3. Configure SwarmUI to use the correct model root directory (/kaggle/temp).
4. Add additional backends to utilize both T4 GPUs.

4.3 Using SwarmUI on Kaggle

The article explains how to generate images using SwarmUI on Kaggle, including:

1. Accessing the SwarmUI interface through the provided link.
2. Selecting models and configuring generation parameters.
3. Managing GPU resources to avoid memory errors, especially when using Stable Diffusion 3.

4.4 Retrieving Generated Images

To download images generated on Kaggle, users can:

1. Use a provided notebook cell to zip all generated images.
2. Download the zip file through the Kaggle interface.

5. Additional Resources and Community

The article concludes by highlighting additional resources and community platforms for SwarmUI users:

1. A Discord server with over 7,000 members for support and discussions.
2. The SwarmUI GitHub repository for the latest updates and contributions.
3. A Patreon-exclusive post index for accessing advanced tutorials and information.

In conclusion, this comprehensive guide provides detailed instructions for setting up and using SwarmUI on three different cloud computing platforms: Massed Compute, RunPod, and Kaggle. By following these step-by-step instructions, users without powerful local GPUs can harness the power of advanced AI models for image generation. The article emphasizes the importance of understanding SwarmUI's functionality through the recommended Windows tutorial and encourages users to engage with the community for further support and resources.


Monday, June 24, 2024

Zero to Hero Stable Diffusion 3 Tutorial with Amazing SwarmUI SD Web UI that Utilizes ComfyUI

Zero to Hero Stable Diffusion 3 Tutorial with Amazing SwarmUI SD Web UI that Utilizes ComfyUI

https://youtu.be/HKX8_F1Er_w


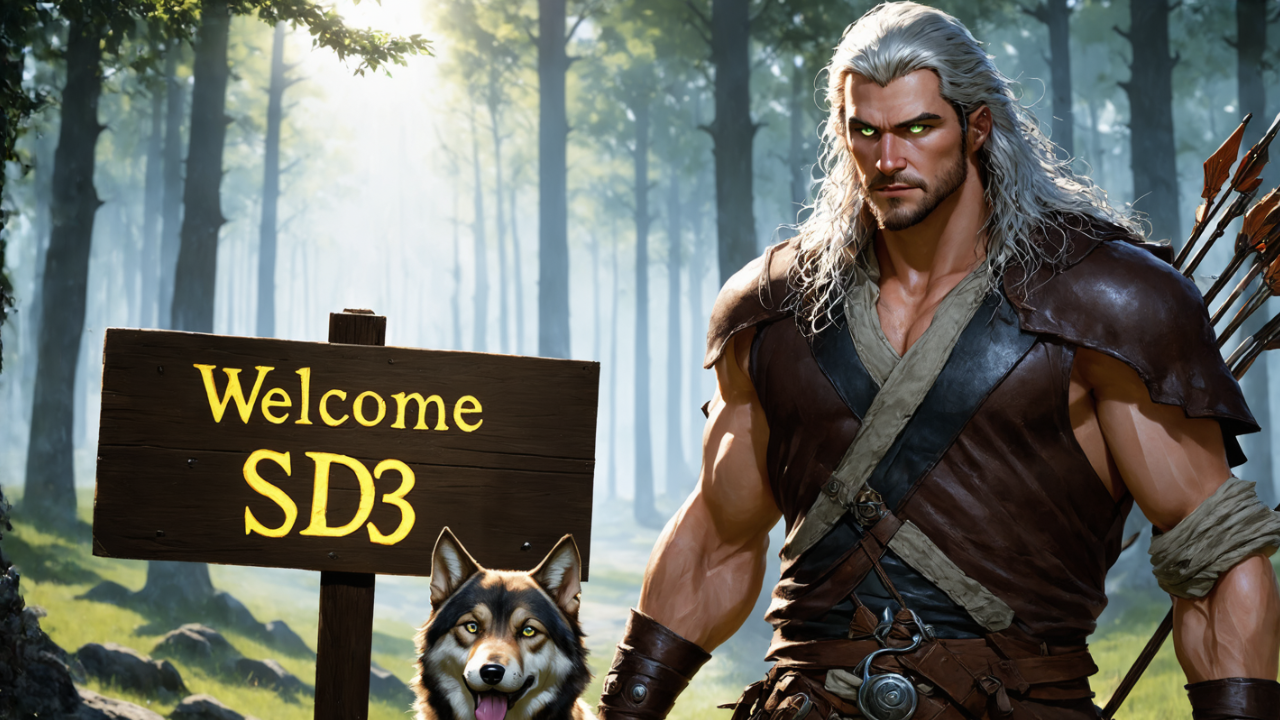
Do not skip any part of this tutorial to master how to use Stable Diffusion 3 (SD3) with the most advanced generative AI open source APP SwarmUI. Automatic1111 SD Web UI or Fooocus are not supporting the #SD3 yet. Therefore, I am starting to make tutorials for SwarmUI as well. #StableSwarmUI is officially developed by the StabilityAI and your mind will be blown after you watch this tutorial and learn its amazing features. StableSwarmUI uses #ComfyUI as the back end thus it has all the good features of ComfyUI and it brings you easy to use features of Automatic1111 #StableDiffusion Web UI with them. I really liked SwarmUI and planning to do more tutorials for it.

πŸ”— The Public Post (no login or account required) Shown In The Video With The Links ➡️ https://www.patreon.com/posts/stableswarmui-3-106135985

0:00 Introduction to the Stable Diffusion 3 (SD3) and SwarmUI and what is in the tutorial
4:12 Architecture and features of SD3
5:05 What each different model files of Stable Diffusion 3 means
6:26 How to download and install SwarmUI on Windows for SD3 and all other Stable Diffusion models
8:42 What kind of folder path you should use when installing SwarmUI
10:28 If you get installation error how to notice and fix it
11:49 Installation has been completed and now how to start using SwarmUI
12:29 Which settings I change before start using SwarmUI and how to change your theme like dark, white, gray
12:56 How to make SwarmUI save generated images as PNG
13:08 How to find description of each settings and configuration
13:28 How to download SD3 model and start using on Windows
13:38 How to use model downloader utility of SwarmUI
14:17 How to set models folder paths and link your existing models folders in SwarmUI
14:35 Explanation of Root folder path in SwarmUI
14:52 VAE of SD3 do we need to download?
15:25 Generate and model section of the SwarmUI to generate images and how to select your base model
16:02 Setting up parameters and what they do to generate images
17:06 Which sampling method is best for SD3
17:22 Information about SD3 text encoders and their comparison
18:14 First time generating an image with SD3
19:36 How to regenerate same image
20:17 How to see image generation speed and step speed and more information
20:29 Stable Diffusion 3 it per second speed on RTX 3090 TI
20:39 How to see VRAM usage on Windows 10
22:08 And testing and comparing different text encoders for SD3
22:36 How to use FP16 version of T5 XXL text encoder instead of default FP8 version
25:27 The image generation speed when using best config for SD3
26:37 Why VAE of the SD3 is many times better than previous Stable Diffusion models, 4 vs 8 vs 16 vs 32 channels VAE
27:40 How to and where to download best AI upscaler models
29:10 How to use refiner and upscaler models to improve and upscale generated images
29:21 How to restart and start SwarmUI
32:01 The folders where the generated images are saved
32:13 Image history feature of SwarmUI
33:10 Upscaled image comparison
34:01 How to download all upscaler models at once
34:34 Presets feature in depth
36:55 How to generate forever / infinite times
37:13 Non-tiled upscale caused issues
38:36 How to compare tiled vs non-tiled upscale and decide best
39:05 275 SwarmUI presets (cloned from Fooocus) I prepared and the scripts I coded to prepare them and how to import those presets
42:10 Model browser feature
43:25 How to generate TensorRT engine for huge speed up
43:47 How to update SwarmUI
44:27 Prompt syntax and advanced features
45:35 How to use Wildcards (random prompts) feature
46:47 How to see full details / metadata of generated images
47:13 Full guide for extremely powerful grid image generation (like X/Y/Z plot)
47:35 How to put all downloaded upscalers from zip file
51:37 How to see what is happening at the server logs
53:04 How to continue grid generation process after interruption
54:32 How to open grid generation after it has been completed and how to use it
56:13 Example of tiled upscaling seaming problem
1:00:30 Full guide for image history
1:02:22 How to directly delete images and star them
1:03:20 How to use SD 1.5 and SDXL models and LoRAs
1:06:24 Which sampler method is best
1:06:43 How to use image to image
1:08:43 How to use edit image / inpainting
1:10:38 How to use amazing segmentation feature to automatically inpaint any part of images
1:15:55 How to use segmentation on existing images for inpainting and get perfect results with different seeds
1:18:19 More detailed information regarding upscaling and tiling and SD3
1:20:08 Seams perfect explanation and example and how to fix it
1:21:09 How to use queue system
1:21:23 How to use multiple GPUs with adding more backends
1:24:38 Loading model in low VRAM mode
1:25:10 How to fix colors over saturation
1:27:00 Best image generation configuration for SD3
1:27:44 How to apply upscale to your older generated images quickly via preset
1:28:39 Other amazing features of SwarmUI
1:28:49 Clip tokenization and rare token OHWX

LivePortrait AI: Transform Static Photos into Talking Videos. Now Supporting Video-to-Video Conversion and Superior Expression Transfer at Incredible Speed

LivePortrait AI: Transform Static Photos into Talking Videos. Now Supporting Video-to-Video Conversion and Superior Expression Transfer at I...